Manual Roasting: Master Your Roasting Art
Manual roasting is the most core and free function of the HiBean App. It turns the App into a powerful real-time monitoring and control center, allowing you to fully control every variable in the roasting process and maximize your roasting philosophy and experience.
How to start a manual roast
- On the "Device" main page, make sure your roaster is successfully connected.
- Click the conspicuous "Start Roasting" button in the center of the screen.
- You will enter the "Roasting Preparation" page, where you can select the roasting profile to use (or create a new one).
- After confirming the information, click "Start", and you will officially enter the manual roasting interface.
Roasting Interface Overview
The manual roasting interface is mainly divided into three major areas. The following figure shows a typical interface layout during roasting:
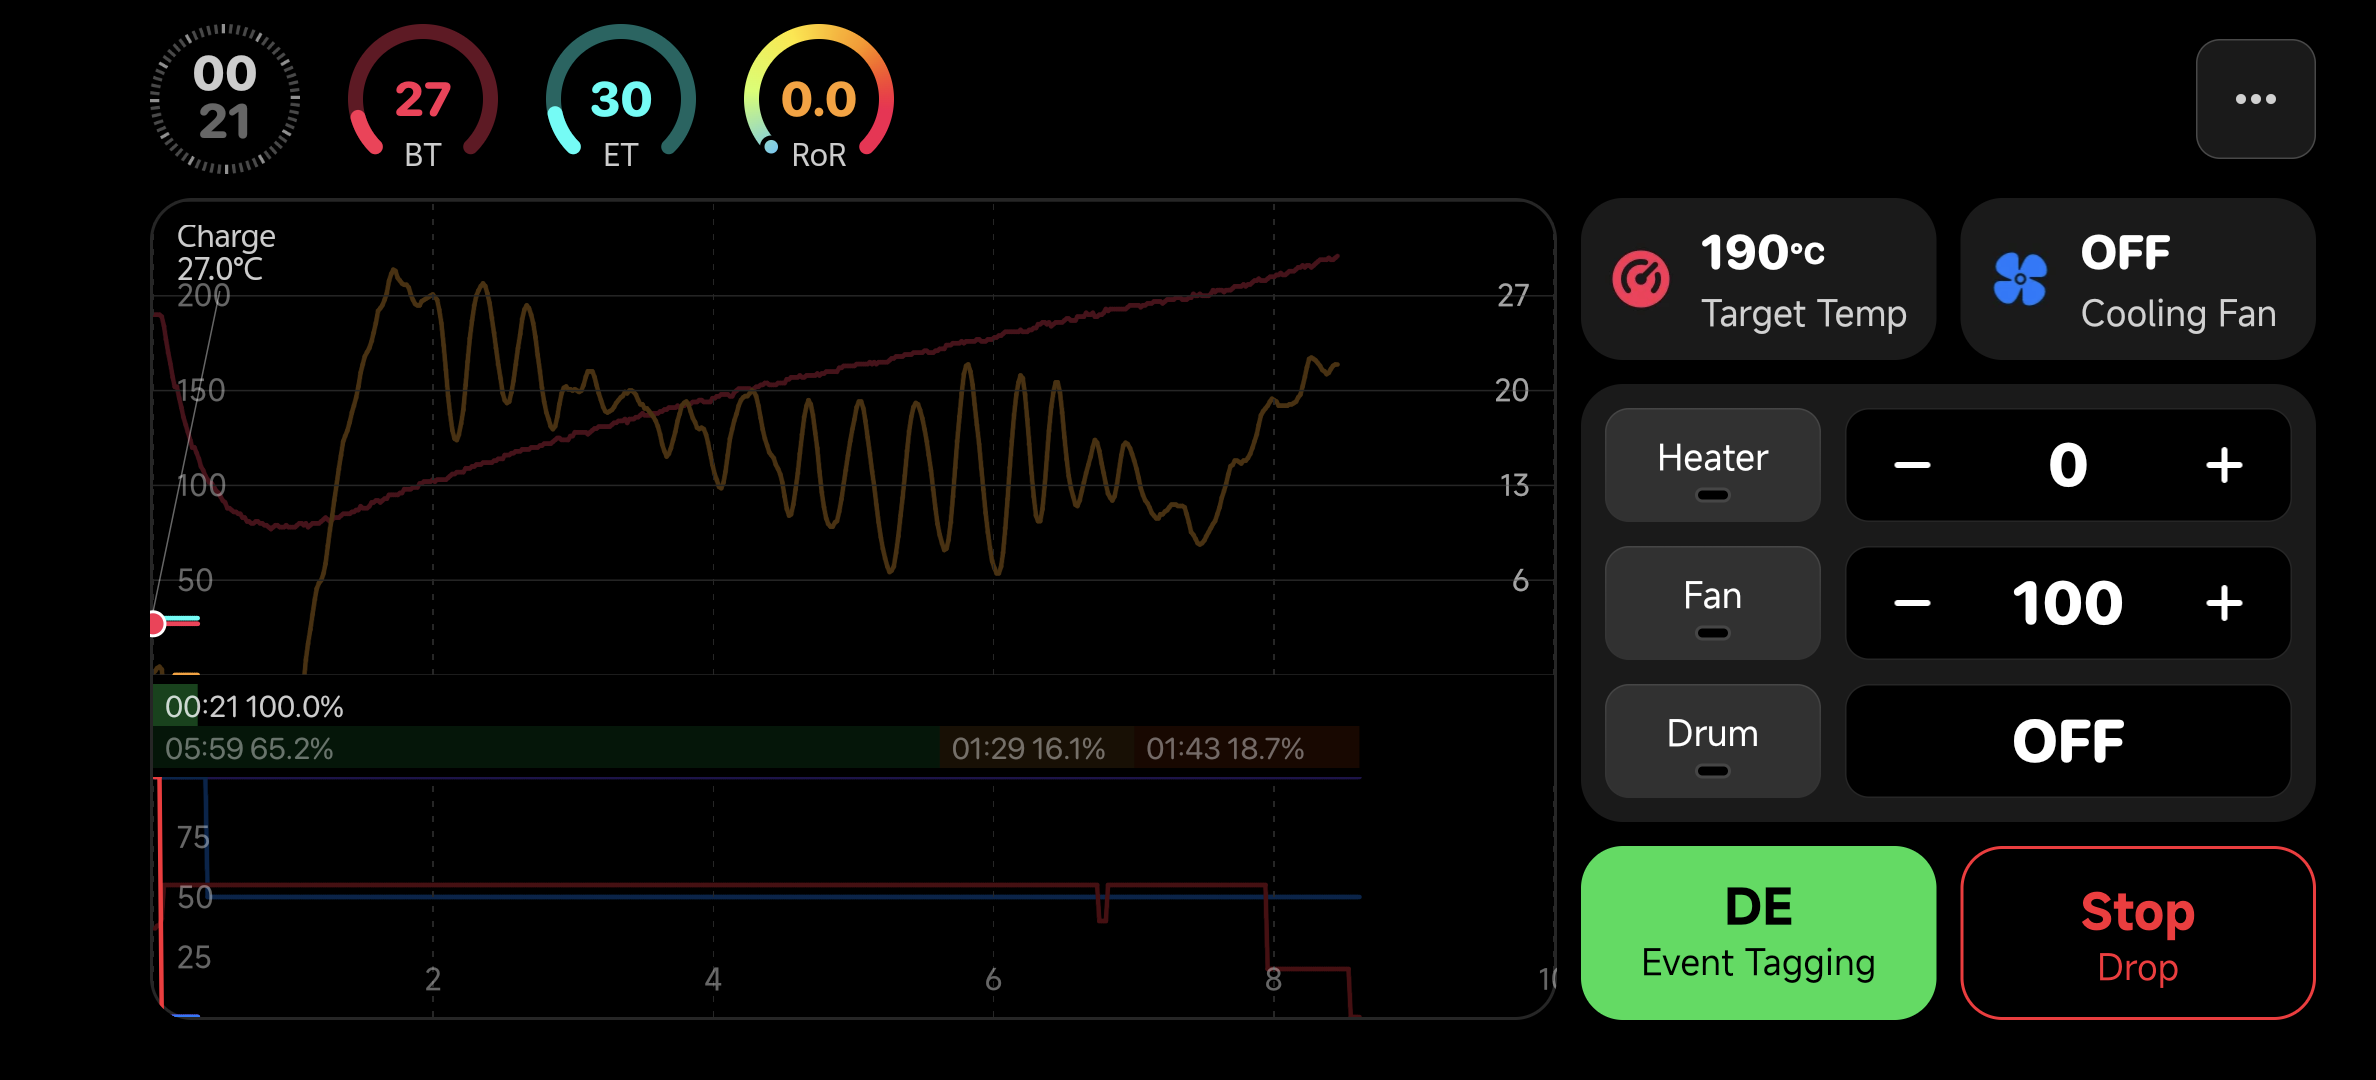
1. Top Status Bar

Located at the very top of the screen, it displays the most critical core data of this roast in real time:
- Roasting Time: The total time elapsed since the start of the roast.
- Bean Temperature (BT): The real-time temperature of the coffee beans.
- Environmental Temperature (ET): The real-time temperature of the roasting environment (depending on whether the device supports it).
- Rate of Rise (RoR): The rate of change of the bean temperature over a period of time, which is a key indicator for judging the progress and trend of the roast.
2. Left: Live Chart
This area occupies the largest area of the screen and dynamically draws the temperature curve of this roast in the form of a chart, allowing you to intuitively monitor the trend of the roasting development.
3. Right: Control & Event Panel
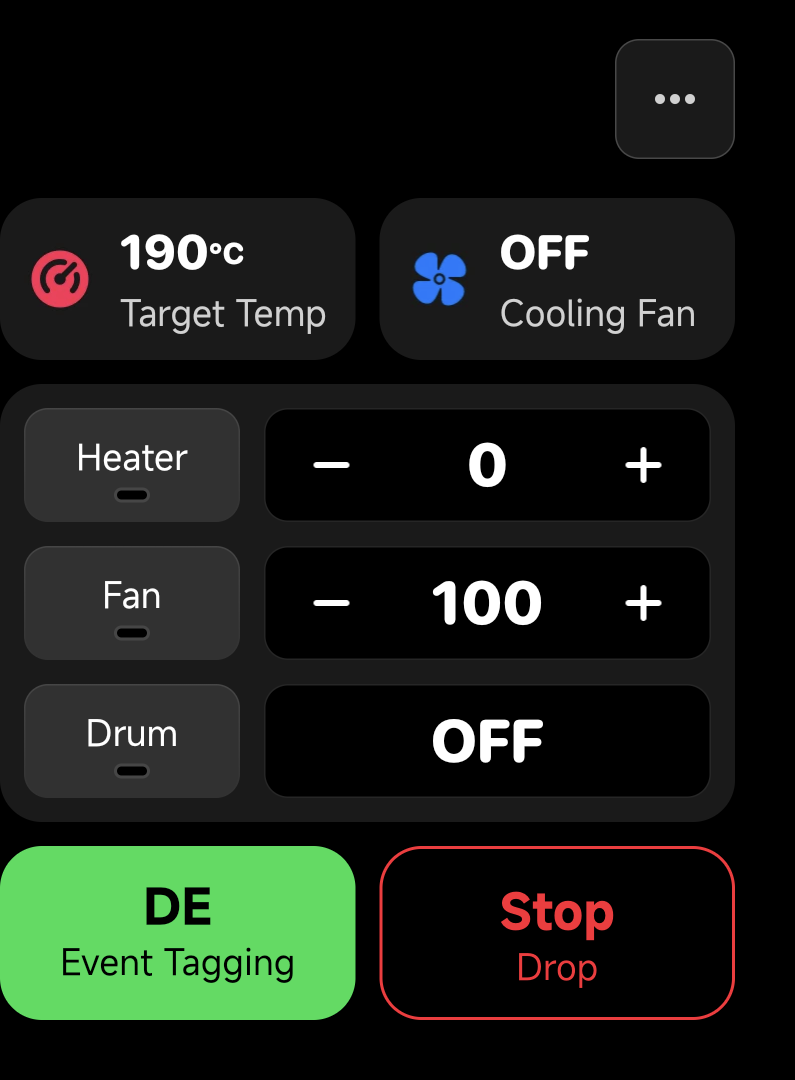
This is the core area where you perform all operations in manual roasting. It is divided into two parts:
Upper part: Control Panel
- Power: Adjust the heating power of the roaster in real time through a slider or buttons.
- Fan: Control the size of the airflow through the bean drum.
- Drum: Adjust the rotation speed of the drum.
- (The specific controllable options depend on the model and capabilities of the device you are using)
Lower part: Event Panel
- Here, you can manually mark the key nodes in the roasting process. Each mark will leave a permanent "pin" on the temperature curve for your subsequent review.
- Charge: Marks the official start of roasting.
- Dry End: Marks the node where the coffee beans have completed dehydration.
- First Crack: Marks the moment when the first batch of beans cracks.
- Second Crack: Marks the moment when the second batch of beans cracks.
- Drop: Marks the end of roasting and saves all data.
End and Save
When you think the roast has reached perfection, click the "Drop" button on the event panel.
The app will stop timing and recording, and will automatically save all the data of this roast, including the complete temperature curve and all the events you marked, to your "Roasting History" for you to view at any time.